
Solution:
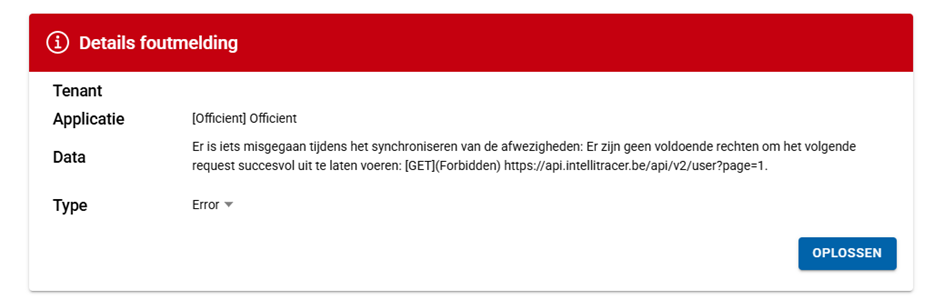
Within the Clickker Cloud configuration, the details of a GeoDynamics user who does not have all the necessary rights were entered.
The specified GeoDynamics user must have at least the following rights:
- Api: Resource management
- Api: Time recording management
See a description of how to do this within Geo Dynamics at the bottom of this document.
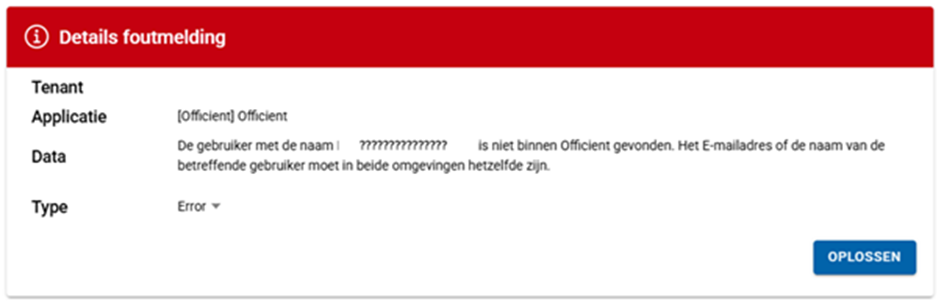
Solution:
If the employee is to be synchronised between Exact Officient and Geo Dynamics, it is important that the name or email address matches.
If this employee is not meant to be synchronised, you can exclude it in the Clickker integration configuration based on the name with a certain prefix. This is now also possible for multiple prefixes with no maximum! See below for how to include prefixes when setting up the link.
If the employees in Exact Officient are not linked to a payroll provider, they are also excluded on that basis. So if that is an option, this can also be done. You can ask Exact Officient how employees are or are not linked to a payroll provider!
Set prefixes for employees to be excluded from synchronisation
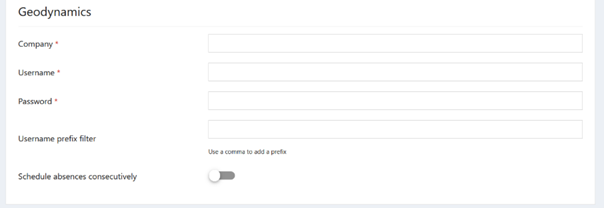
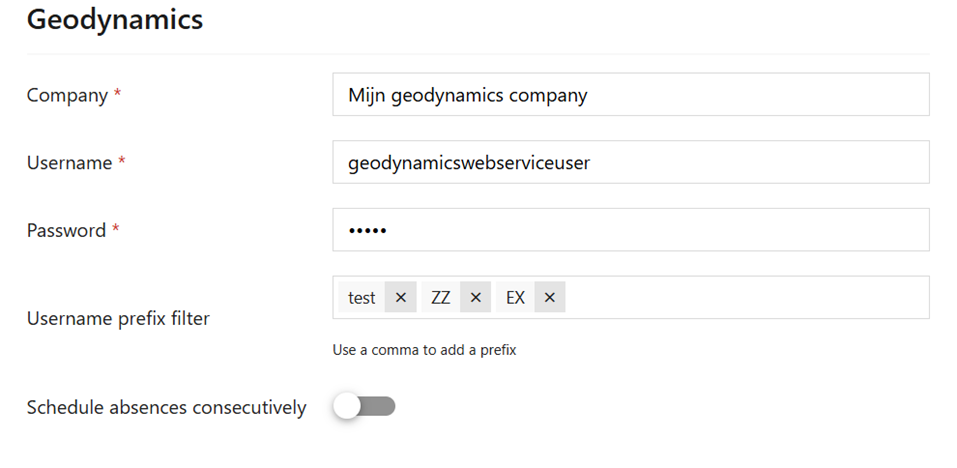
When linking, additional functionalities can be used to customise the integration. In the registered application within Clickker Cloud, a number of fields are available for this purpose under the heading "Geodynamics".
These include the following fields: 'Username prefix filter' and 'schedule absences consecutively'.
The link will retrieve the GeoDynamics users so that all absences of the relevant users can be imported from Officient to GeoDynamics. If the absences of certain users do not need to be synchronised, the users can be excluded using prefixes. Indeed, within the link, for each GeoDynamics user, it will be checked whether the user's name starts with a specified prefix.
These prefixes can be specified within the 'Username prefix filter' field. To add a specific prefix to the input field, a comma will have to be entered at the end of the desired prefix. It is possible to specify multiple prefixes. There is no limit to this. A prefix can be deleted by clicking on the cross next to the relevant prefix. When changes are made to the prefixes, the application data will have to be saved with the 'Save all changes' button.
Overlapping absences in Officient vs GeoDynamics.
Within Officient, multiple absences can be scheduled at the same time. For example, absence A might be from 9:00 to 12:00 and absence B might be scheduled from 10:00 to 11:00. However, this is not possible within GeoDynamics.
If absences are scheduled at the same time in Officient, these absences can be scheduled consecutively within GeoDynamics. This can be done by turning on the button next to the 'Schedule absences consecutively' field. This change will still need to be saved by pressing the 'Save all changes' button.
When the relevant functionality is active, for example, absence A will be scheduled from 9:00 to 12:00 within GeoDynamics and absence B from 12:00 to 13:00. If the specific functionality is not enabled, then all overlapping absences will not be imported into GeoDynamics. An error message will then also be registered in Clickker Watcher about the relevant overlapping absences. One of the overlapping absences will then have to be removed from Officient first.
Instruction assigning rights for integration within Geo Dynamics.
Steps for setting the rights of a GeoDynamics user
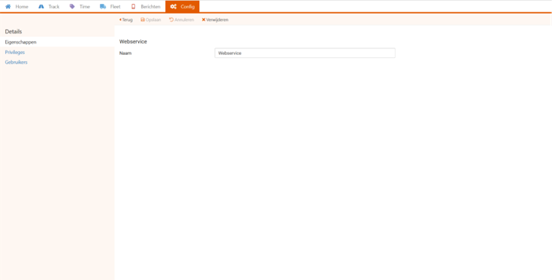
- Within GeoDynamics, navigate to Config → Users → Roles. An overview of all available roles is then listed. Create a new role or modify the existing role of the user specified in Clickker Cloud with the created Office application.
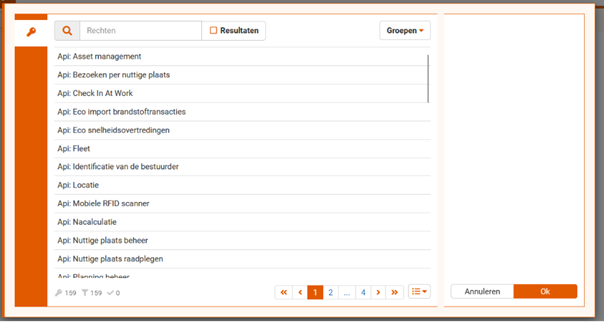
- On the left-hand side of the screen, “Privileges” can be pressed. It then shows all rights/permissions the role has. A permission can be added via the “Add” button. A list of available permissions is displayed. The following permissions must be selected, if not already selected for the relevant role: Api: Resource management and Api: Time recording management. Then press the “Ok” button to save the permissions. Role name may be translated (depending on the chosen language settings in GeoDynamics).
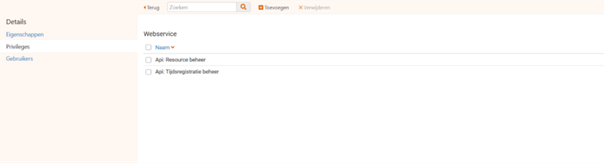
- Once the permissions are selected, they will show up in the overview.
- To assign a role to a user, click on the “Users” menu item (on the left-hand side of the screen). An overview of all users who have been assigned the role is then displayed. The role can be assigned to a specific user via the add button.
- The login details of the relevant user (with at least the two permissions mentioned earlier) can then be entered. Once the data is saved, the Office application is connected and the application is set to active in Clickker Cloud, the absences will be imported to GeoDynamics within a maximum of 20 minutes.