
Step 1: Download the zip file from:
https:/app.clickker.nl/Clickker.Update.zip
(If you are unable to download this, please copy the full URL to the clipboard and paste it into the address bar of your web browser)
Step 2: Stop the Windows service: Clickker.Updater
Step 2 a) Use the Windows search bar to search for the word ‘services’. Open the application that appears in the results.
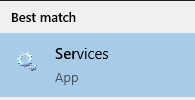
Step 2 b) On the screen that now opens, look for Clickker.Updater

Step 3 c) Right-click on Clickker.Updater and select ‘Properties’
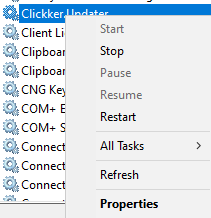
Step 4 d) You can stop the service via the screen that opens. You will also see straight away where the Clickker installer has been placed
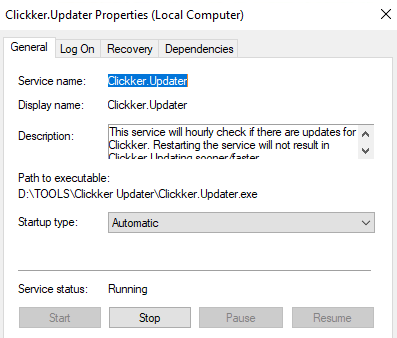
Step 5) Navigate to the folder where the Clickker Updater is installed; in our example, this is D:\TOOLS\Clickker Updater
Step 6) Unzip the file you have downloaded which will overwrite any existing files. It is important that this actually happens and that you have the necessary rights to do so!!!
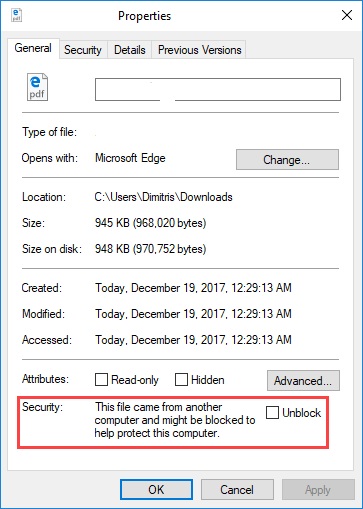
Step 7) Check that none of the files are blocked. To do this, right-click on the files in this folder and select “Properties”. If a file is locked, you can tick the box at the bottom right labelled ”Unblock”, after which this option will no longer appear in the “Properties” window when you click on the file again.
Step 8) Start the Clickker.Updater service.
To check whether this has worked, you can open the Serviceconfig.tsc file in the Clickker folder mentioned above using Windows Notepad to verify that the very latest version has been installed. From 10 August 2026, this should be Build 8644, and for updates released after that date, the build number will be higher!
Troubleshooting:
If things do go wrong and Clickker doesn’t respond or the updater fails to start, there are two further steps you can take:
 English (UK)
  Nederlands
  Français
  Deutsch
  Español
  Polski